Getting Started
The following topics include information to help you get started with Floor.
Videos
To further your understanding of Floor, some Help topics include a video link that you can select. Look for the ![]() icon.
icon.
Interfaces
Floor includes the following two interfaces:
Regular Interface: In the Regular interface, all data entry fields are listed on the page at the same time. For more information about the Regular interface, see Regular Interface.
Guided Interface: In the Guided interface, when you are performing warehouse receiving and shipping, only one data entry field is displayed on the page at a time. For more information about the Guided interface, see Guided Interface.
Most user interface elements are common to both interfaces, however, the Guided interface includes some additional user interface elements. For more information, see Guided Interface Elements.
Main Menu
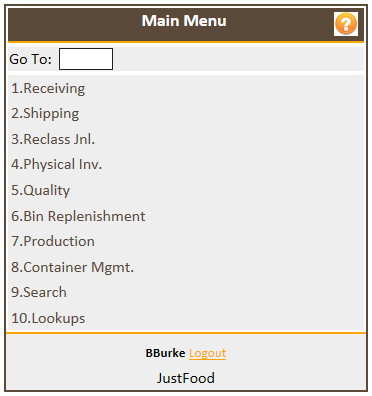
The Main Menu is a centralized location where you can begin to access all Floor features and functions.
Question Mark Icon
![]()
The following tasks can be performed after choosing the Question Mark icon:
Home Icon
![]()
To access the Main Menu from most Floor pages, choose the Home icon.
Record Navigation

To navigate through records in the Regular interface, choose the First, Previous, Next and Last buttons.
Up Arrow

To select a shipping agent, choose the Up Arrow.
Back Arrow

To return to a previous page, choose the Back Arrow.
Assist Button

Depending on the page that you are on, the Assist button allows you to perform the following tasks:
Line Details: Display the line details.
Comments: Display comments.
Split Line: Split a line.
Delete Line: Delete a line.
Scan Mode and Manual Mode: Switch between Scan Mode and Manual Mode.
Change UOM: Change the unit of measure.
Scan Mode and Manual Mode
Scan Mode provides the capability for you to scan a label, which reads the label information, and then populates the relevant fields in Floor. Typically, Floor pages open in Scan Mode.
If you are in Scan Mode but must manually add information, for example, a label was too damaged to scan, you can switch to Manual Mode. After you have added or modified the information manually, you can return to Scan Mode.
To enter or correct information manually, choose the Assist button, and then select Manual Mode.
The fields where you can manually enter information are displayed.
To return to Scan Mode, perform one of the following steps:
Choose the Assist button, and then select Scan Mode.
Move to the next record.
Guided Interface Elements
The following user interface elements are unique to the Guided interface:
Field Navigation Buttons

To navigate through data fields in the Guided interface, choose the Previous (<) and Next (>) buttons.
Line Navigation Buttons

To navigate through lines in the Guided interface, choose the First (<<), Previous (<), Next (>) and Last (>>) buttons.
Input Fields
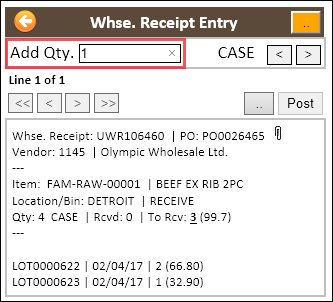
When you scan a label or enter information, input fields are populated.
The fields that are displayed are determined by the settings for the PICK_LINE_GD interface on the JustFood Floor Interfaces page.
Some fields are only displayed based on the setup for an item, for example:
The Lot No. field only appears when the item is lot tracked.
The Serial No. field only appears when the item is a serial tracked item.
The Net Weight field only appears when the item is a variable weight item.
Comments Icon
![]()
If an entry has comments, a paper clip icon is displayed that allows you to view the comments. To view more details about the comment, choose the Assist (..) button, and then to open a page with the date, comment, and code, select Comments.
Entered Data
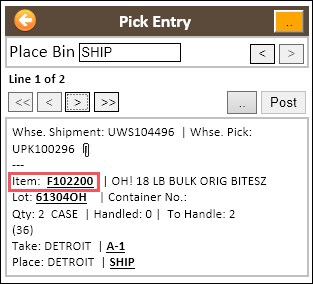
Data that was entered is displayed as bold, underlined text.
Receiving Unit of Measure
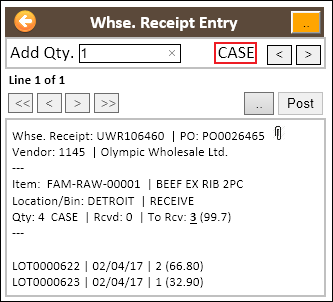
The receiving unit of measure (UOM) is displayed on the Whse. Receipt Entry page. To change the UOM, choose the Assist button, and then choose Change UOM.
Weight
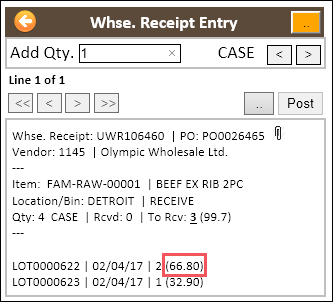
The weight of an item or items is displayed in parentheses.